Hello there, my Witchie-Poos! I’ve been promising this tutorial for quite awhile and just now have got the chance to sit down and write it out!
Needle felting is my newest hobby! It’s fun as all get out and the results are always super adorable. I honestly had never heard of needle felting before I had watched a NerdECrafter video that she collaborated on with Maqaroon. Maqaroon needle felted an ultra cute poodle character from Animal Crossing and I continued watching her needle felting videos and fell in love.
And all the kits and all the wools and OMG… It’s a hobbyists daydream.
I’m going to be doing a couple of these needle felting tutorials, so keep an eye out!
First up is this super cute lion on a camera. Which, of course… Appealed to me. And I tried to make the lion look like a hedgie, but that failed miserably. It still looks like a lion. Pffft. Oh well.
You can find this kit, and TONS of others at HandCrafters Etsy shop. Do be aware that these kits are sent from Hong Kong so it takes forever for it to get to you and the “tracking” number they give is less than reliable as they don’t update information on them very often, but it is worth the $8 you spend, in my opinion.

Here’s what you’re going to need. You’ll need the kit (duh), the instructions (double duh), a needle felting pad (foam or a magic eraser works well for this) and needle felting needles. They’re super sharp and have barbs on the side that mat the felt down. You can use just single needles, which I use the most here or a multi-needle tool, which I thought I would love but I hate in all actuality. I wish I hadn’t wasted money on it. Oh well, you live and learn. Some kits you may find come with the felting mat and a needle but these do not, so keep that in mind!

This is the wool you receive in the kit. It’s wayyyy more than enough, so you don’t have to be afraid of not having exactly what you’ll need. You also get a small tuft of white wool, findings to make your “charm” into a keychain and a pair of tiny little beady eyes.
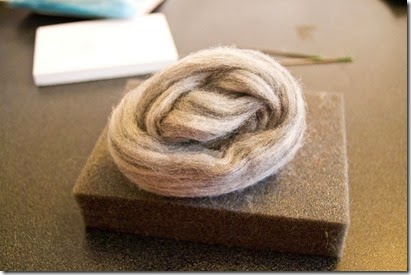
To start out you’ll want to pull out a decent hank of wool. Just find the end of your blob and gently pull out a length roughly half the size of your fist.

Begin felting using short jabs with your felting needle in a sideways motion. Work your ball of felt into a rectangle shape.

Rotate your piece and keep your jabs uniform to achieve the shape.

Don’t forget the sides!
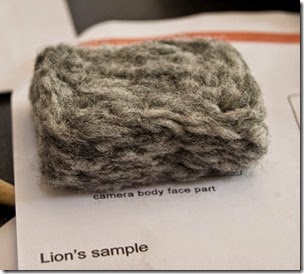
Make sure you check the size to the chart in the back of the instructions.

And here is your finished product!

Next take a thin hank of black wool and lay it across the front of the camera face.

Start needling it down.
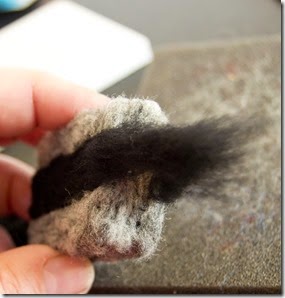
Needle it around to the sides, then close up the gap and smooth everything down with shallow pokes.

Should look something like this!

Take a thin strip of white and felt this right above the black strip.

Take a small piece of grey wool and felt it into a cylinder, felting all around and felting the bottom and top flat.

Felt the sides, top and bottom heavily to create a short, fat cylinder.

But please be careful! These needles are super, duper sharp! They will hurt!

After you stop bleeding, you’ll have something like this. Again, match it up to the diagram in the back of the instructions.

A little size reference.

Take a super thin strand of black wool and lightly felt it around the middle of your “lens”.

The end result.

Put a small tuft of wool where you want the lens. This will help felt the lens to the camera.

Honestly, you could use less wool than I did. But oh well LOL.

Felt it with deep strokes from the sides. You’ll have to get pretty medieval with this.

Also felt directly from the top. Once you’re done you should have no worries about this falling off or being pulled off accidentally.
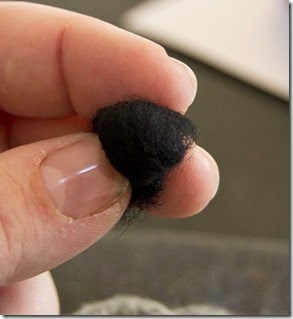
Roll a super small ball of black, actually use a little less than what I’m showing here.

Felt it down into the center of the lens.

Take a small strand of white and lightly felt a line around the black circle.

Super cute, huh??

Take a small rectangle of white wool and felt it right in the middle of the camera to act as the flash.

Then take a square of black wool and felt it to the corner to make a view finder.
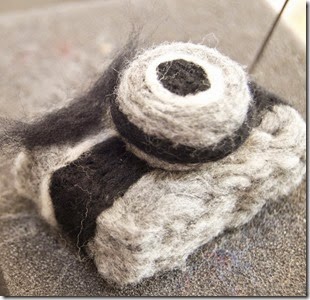
Then do the same for the other corner to act as I have no idea why because there’s never two view finders…….

This is when I did a derp and squeed a little bit over how cute this little mini camera looked lol

Take a teeeeeny tiny bit of black and felt a circle to serve as your shutter release.

Next up take a bit of your buttery yellow and felt it into a bit of a cylinder with a curve like a kidney bean.

Size it up to your camera and continue felting it until you’re pleased with the size.

Take a super small amount of the yellow wool and roll it into a cylinder and felt it into a paw shape.

Make two short ones and two longer ones for the back legs.

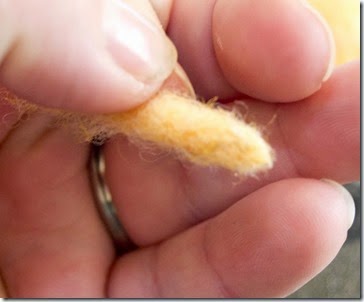

Then take about the same amount, roll it into a loose cylinder and felt an ear shape. Make two.

Leave the wispy ends so you can felt them to the head.

Felt your ears to the head.
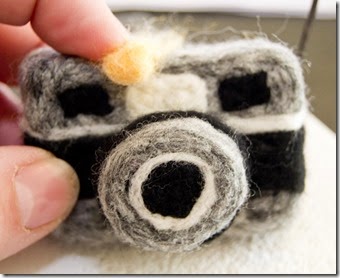
Using the wispy ends of the front legs, felt them to the top of the camera, about in the middle. Repeat with the hind legs.


Felt the body to the camera.

Using your felting needle, “drill” some holes for the eyes to go. How do you do this? Stick the needle into the head where you want your eye to go and then use quick, short jabbing motions and twist around. You may have to repeat this a few times before you get it exactly right.

Affix the eyes with some craft glue and push them in. You’ll really have to work at this.

Take a hank of the light brown wool and start giving your lion/hedgie some hair.
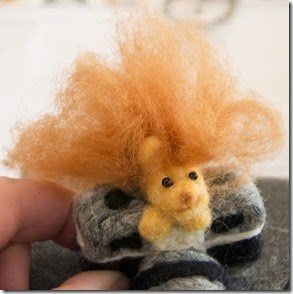
You’ll end up with a rather Don King-esque lion/hedgie.

But you can always give him a trim!

Look at that adorable tukkas!

Use a bit of thread and a needle and sew the end of the chain to the corner of your camera.

Take a teensy bit of grey wool and CAREFULLY felt around the chain to cover it up. If you’re not careful you can break the needle.

And this is your finished product! I attached it to my camera bag. The chain promptly broke and the charm fell off. Kinda ticked about that, to tell you the truth.

But it’s still so cute!

You’re left with a TON of wool. More than likely enough to make a second charm.
All in all this is a pretty easy kit. The instructions in the bag are of course, in Chinese, but they include a set of English instructions that are relatively easy to understand. It took me about 2 hours, and that was breaking for lunch and one million and one questions from my children.
I hope you enjoyed this tutorial! I loved making this cute little guy!


