Showing posts with label Fall. Show all posts

Wednesday, September 23, 2015

Recipe Tutorial: Quick No-Bake Granola Bars

The first few weeks of school have come and gone for my little minions. Well they’re not so little anymore. At almost 14 and almost 12, they’re I guess, pint-sized minions.

Anywho. My kids always beg for an after school snack, so I decided to get a little inventive with the items I already had in the kitchen.

DSC_0184

You’ll need: Oatmeal, rice crispies, brown sugar, honey, peanut butter and assorted fillings. I added dry roasted peanuts, granola, peanut butter chips and marshmallows. You can add pretty much anything you want. The sky is the limit!

DSC_0186

Add your honey, brown sugar and peanut butter in a saucepan and combine.

DSC_0189

It doesn’t look appealing, but trust me. Turn your stove on medium/low and bring to a boil, stirring occasionally. Bring it to a boil and continue boiling for 3 minutes, stirring constantly.

DSC_0188

Get all of your non-melty ingredients together.

DSC_0191

Grease a 9x13 pan and set aside.

DSC_0192

Add the liquid to the dry and stir. Let it cool just a tad.

DSC_0194

Add the marshmallows.

DSC_0196

Peanut butter chips.

DSC_0198

Add some mini chocolate chips and stir to combine.

DSC_0200

Transfer to a pan and using your hands or a spatula, smooth the mixture out.

DSC_0206

Sprinkle with chocolate chips and let cool as long as you can.

DSC_0207

They’re so fantastic smelling that it might be kinda hard to keep your fingers out.

DSC_0211

Cut them into bar shapes when you just can’t handle waiting any longer and enjoy!!


Easy No-Bake Granola Bars

*Note* You can tweak this recipe any way you like. I rarely ever measure anything but the oats for this, so you don’t have to either. Just go with what you think tastes good.

2/3 c Peanut Butter

1/4 c Honey

1/2 c Brown Sugar

3 c Oatmeal

Fillings and Add Ons:

1 c. Rice Crispies

1 c Dry Roasted Peanuts

1/2 c Granola

1 c marshmallows

1/2 c Peanut Butter Chips

1/2 c Mini Chocolate Chips


In a large bowl, combine oatmeal, rice crispies, granola and roasted peanuts. Set aside.

Combine peanut butter, brown sugar and honey in saucepan. Heat over medium-low heat until boiling, stirring occasionally. Once it reaches a boil, time for 3 minutes, stirring constantly.

Pour honey mixture over dry ingredients and stir to combine. Let cool slightly.

Add marshmallows, peanut butter and chocolate chips. Stir.

Press into greased 9x13 inch pan, let cool. Slice into bars and enjoy!

Tuesday, September 22, 2015

Polish Review: Frozen Water Designs

Hello there, Witchie-Poos!!! I hope the last night of summer is treating you well! I’m sitting here, writing this up and watching Dancing with the Stars. I had some computer issues earlier this week, so that’s why I wasn’t able to get any of my reviews up until now. I tried downloading an older version of the Sims and evidently my computer doesn’t have enough RAM to run it and all the other programs I have to use. So something had to give… Sims went down the Recycle Bin!

Anywho! I have three gorgeous polishes from Frozen Water Designs here for your viewing pleasure. But first… Lets get to know a little about the creative genius behind these beauties!

GW: What are your favorite sources for inspiration?


FWD: What isn't, might be the easier question! so far, I've had inspiration from video games, music, TV shows and movies, and comic books. and fan suggestions! Can't forget those.


GW: Where does your creativity stem from to allow you to come up with an array of colors and possibilities?


FWD: I figure if I can visualize it, I can make it. It's been working for me so far.


GW: What do you love about making polish?


FWD: I love that I can look at something, distill it into it's base colours, create it, and then have people look at it and go 'I know exactly what you were going for!'; and I also love that people enjoy wearing these things that came from my wild, random brain.


GW: If someone copies one of your polishes, is that flattering or insulting?


FWD: No one has done it yet, so...it would probably be flattering, but weird. My ideas come from a lot of cool places though, and if the creators of my inspirations ever saw my work, I would hope they'd be flattered, so let's go with I'd be flattered too :)


GW: What made you start making polish?


FWD: I'm super picky about nail polishes. I got pretty tired of thinking I'd enjoy a polish for a long time, but then being dissatisfied after one or two wears. Now I can make exactly what I want. Also, as with many of my crafts, I was advised I would be good at it...so I went for it!


GW: What are some of the new polish trends going around that you like and what are some that you cannot stand?


FWD: I don't generally follow industry trends, so i can't really speak to this a whole lot. If instagram tells me anything though, it's that the fashionista set are getting back into those incredibly long nails, and those kind of make me crazy. I like practical nails, even if the art on them is wild as can be. that's not really polish related though, is it?


GW: Do you have anything awesome in the works for your customers?


FWD:  I'm sure I do, but it's all locked up in my brain until the next bit of glitter bomb crazy sauce strikes...


GW: Lastly, what type of base coat do you use or suggest? As well as top coat?


FWD: My current preferred base coat (when I remember to use it) is Julep’s oxygen smoothing base coat. It's supposedly good for your nails, and it makes everything look nice. I only really use a top coat when doing actual nail art pieces (on myself, haha), so I don't really have a specific one to recommend.


Now on to the beauties!!!

DSC_0854

Diamond Dogs, listed as “a sheer and shimmery white polish, made with a hint of glitter and almond oil (to help nourish your nails).” Will bring you either to the Moulin Rouge or a “foggy” divey joint where you might have found David Bowie crooning in the 80s. Either way, you won’t be disappointed!

DSC_0899

This beautiful, super sheer shimmer does take a bit to reach opacity. I think I have three coats shown here and it’s still kinda sheer. But I love the ethereal look to it! Dry time is nil, and it really does feel awesome on the nail!
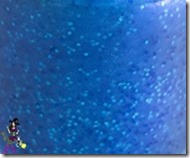
DSC_0865

As beautiful and haunting as the man it inspired, Madman is listed as “a little bit of purple, a little bit of deep blue, and all the sparkle of the stars. oh, and a bit of nourishing marula oil, as well.” It is a truly stunning jelly polish that could have multiple uses in the nail world.

DSC_0912

It builds up wonderfully for a sparse jelly sammich, but still looks gorgeous with all the shimmer and shine of the glitter.

DSC_0922

And lastly, I have one of the two polishes that makes up the Crema Collection. This is Espresso, a beautiful coffee/copper colored holo beauty. Its duo mate, Cream unfortunately had a bit of a disaster in transit.

But honestly. Espresso is a STUNNER. It really, really got me wanting everything fall-color related. I need all the falls!!

With every polish that I’ve reviewed, dry time is nil on Espresso as well. They’re not overly stinky like a lot of them are anymore. They apply seamlessly and beautiful.

At $10 a bottle, it is in the mid-range of my Indie Designer list and you won’t be disappointed. Make sure to check out her Etsy store!


Disclaimer

Wednesday, November 19, 2014

Recipe Corner: Baklava

My favorite time of year is just after fall hits… When it’s still warm enough outside to get out and do yard work in your capris and shirt sleeves but not warm enough to heat up the inside when you bake, creating an inferno-like situation. As soon as this happens I whip out a piece of paper and begin my fall/winter baking lists.

Right at the top of the lists is Baklava. I got this recipe a few years ago from my Scentsy lead and I’ve been making it ever since. It’s addictive… You think about it at weird times during the summer when it’s incredibly too hot to have the oven on for 55 minutes and stand at a stove for 20… You dream about it… You salivate like Homer does when he talks about donuts.

So I will show you how to make my heavenly baklava. It’s easier than you think, so don’t be daunted. Embrace that which is baklava. It will change your life forever. As always, recipe will be after the tutorial!

DSC_0384

For the Baklava you’ll need a 9x13 inch pan. Grease it up good with cooking spray. You’ll also need a roll of fillo dough and a moist tea towel to keep it moist. This is very important. If you don’t keep the dough moist, it will crack and tear and just be a bear to work with. I also have over there a bowl with a silicone brush, some real butter and a knife. And what’s not pictured… Pecans and cinnamon. Oh and you’ll need the recipe… And your cellphone if you just can’t seem to be separated from the stupid thing (like me).

DSC_0383

Finely chop or kinda ground your nuts. You can use walnuts, but I use pecans because I don’t care for walnuts anymore. Add your cinnamon, stir it around til the pecans are coated.

DSC_0385

Add one (two sheet) layer of fillo dough, slather it with melted butter. Repeat until you have like eight sheets layered with butter in between.

DSC_0386

Sprinkle your pecans on. Top with two sheets of buttered fillo dough and continue with one of the pecans, two more of the fillo, until you have all the pecans gone. Finish up with a layer around 6-8 layers thick.

DSC_0388

Like this. Cover the top with melted butter.

DSC_0389

Here’s the tricky part. Using a sharp knife, cut the baklava into squares. Cause believe me. It’ll be too hot right out of the oven, then too sticky after you put the syrup on. This way it’s already cut and all that yummy syrup can seep into the cracks. If you want to be fancy and cut your stuff into squares, you can go right ahead and do that. But I’m not fancy, and this stuff is a PAIN in the butt to work with. Trust me. LOL

Now you put the baklava in the oven and wait and wait and wait and wait. You may die waiting. And your house will smell FABULOUS!!! Like you want to bottle it up and get high off it fabulous.

DSC_0391

While you’re salivating over the smell of the baklava cooking, you can get your syrup going. You’ll need a heavy saucepan, honey, vanilla, white sugar, and water.

DSC_0392

Combine all that and simmer for 20 minutes.

DSC_0394

Get your baklava out after the 50 minutes has elapsed and it’s golden brown and beautiful. Revel in its loveliness.

DSC_0395

Then CAREFULLY and SLOWLY pour the super hot syrup over the baklava. You’ll have to do it in stages… And be careful not to float the tops off the baklava. Or if you do… You can just eat them…

DSC_0396

Then you wait until it cools slightly. I usually wait until I think the fear of incinerating my tongue has passed. This year it wasn’t to be. I ended up burning the crapholies out of my tastebuds, but man it was so worth it! Tasted soooo good.

So here’s the recipe:

Breazy’s Best Baklava

1 pound ground nuts (pecans, walnuts, etc)

1 tbsp cinnamon

2 sticks (or three) melted butter

1 pkg fillo dough, thawed and brought to room temp

Syrup

1 c Water

1 c white sugar

1/2 c honey

1/2 tsp vanilla


Preheat oven to 350 degrees. Spray bottom and sides of a 9x13 pan.

Grind nuts and toss with cinnamon. Set aside. Unroll fillo dough. Cover fillo with a dampened cloth to keep from drying out as you work. Place two sheets of dough in pan, butter thoroughly. Repeat until you have eight sheets of layered dough. Sprinkle 2-3 tablespoons of nut mixture on top. Top with two sheets of dough, butter, nuts, layering as you go. Continue until all the nuts are gone. Top layer should be about 6-8 layers thick.

Using a sharp knife, cut into diamond or square shapes all the way to the bottom of the pan. Bake for about 50 minutes until the baklava is golden and crisp.

Make sauce while baklava is baking. Boil sugar and water until sugar is melted. Add vanilla and honey. Simmer for about 20 minutes.

Remove baklava from oven and immediately spoon sauce over it. Let cool. Freezes well. Leave it uncovered as it gets soggy if it’s wrapped up.


Now I haven’t frozen it yet. I’ve been tempted. But I don’t know whether it should be before it’s baked or after it’s baked? I’m just so scared of ruining some lol. It just costs soooooo much to buy a pound of pecans.

I hope you enjoy this recipe as much as my family and I do. If you make it and use a different kind of nuts, like hazelnuts or cashews, let me know!

Monday, September 22, 2014

Tutorial Corner: Halloween Hobgoblins and their habitat

So I’ve been sharing pictures on my Facebook via Instagram of the cute little Hobgoblins I’ve been making. I got the idea from a picture on Pinterest:

764858aa1b62b6caa3b92601c1418b0e

I was like hmmm… I could do those with no problem! So here’s how I did them!

DSC_0002

You’ll need a habitat (if you want one, it’s optional! You can always hang them from the ceiling from fishing line, as it’s shown in the picture above. You’ll also need some feathers of your choice (Walmart, $2.97); Spanish Moss (Walmart, $3.49); miniature skeletons of your choice. I got mine at the Dollar Tree. They’re a part of a “Skeleton Garland” that I just cut apart from the string. You’ll also need a hot glue gun, glue sticks and scissors.

DSC_0005

Step One: Remove your skeletons from the string (if applicable).

DSC_0006

Step Two: If needed, shorten the legs. Just take a small bit of the lower leg out.

DSC_0007

While you’re at it, take the femur from the knee joint with your scissors. It’s best to do both legs at the same time, just make sure you don’t get your sides confused.

DSC_0008

With a small amount of hot glue, attach the lower leg back together.

DSC_0009

Do the same with the thigh.

DSC_0010

Then glue the leg all together. Give the knee a bit of a bend backwards to make it look like it’s floating.

DSC_0011

DSC_0012

Step Three: Cut the lower arm off at the elbow. Poor Skelley.

DSC_0013

Step Four: Kind of bend your skeletons arm at the joint however you want it.

DSC_0014

Step Five: Glue the arms to the elbows in a raised fashion so it looks like this:

DSC_0015

DSC_0016

Pose your dude like he’s drunk.

DSC_0017

And him and his buddy will eventually look like they’re doing the Thriller.

Now comes the fun part….

DSC_0019

Step Six: Taking your feathers, get your idea laid out on the table in front of you. Think about how they’ll look on the finished product, so make sure the curved feathers go in the right direction.

DSC_0020

Step Seven: Using a pretty good size dollop of hot glue (be careful not to burn your fingers!) attach the wings to the back, right between the shoulder blades on the spine.

DSC_0021

Finish both sides and then take a smaller feather to cover up the mess you made out of the spines of the feathers. Trust me, you’ll make a mess. I know I did.

DSC_0022

Repeat the steps with your other, more bashful, Hobgoblin.

DSC_0023

And make it look like it has an awesome little purple backpack.

DSC_0024

Ehhhh this one doesn’t really care, as long as he’s part of the party.

DSC_0029

Step Eight: With a small amount of hot glue, affix a bit of the fishing line to your hobgoblins back.

DSC_0031

Step Nine: If you’re making a habitat, this is the time to figure out how you’re going to want to fix them in it. I was having issues trying to get them on the lid right, so I ended up using a small amount of glue on the rim of my glass canister and held the fishing line for a bit for the glue to firm.

Add some Spanish moss, some twigs and maybe some mini-tombstones if you have them and voila! You have a Hobgoblin Habitat. But! Please Note: If you plan on leaving these outside, please note that you’ll want to use high heat hot glue. If not, if they are in direct sunlight, the hot glue will weaken and your hobgoblins will fall apart. Plus, if they’re in a small container, like a jar, the glue heats up and causes condensation in the jar, so make sure to poke a few holes for heat to get out (oh and to let your Hobgoblin breathe!)

DSC_0035

DSC_0038

DSC_0039

If you would like to see a tutorial on how to do the spider web lid to this canister, let me know and I’ll do one!

DSC_0041

Awww look they’re dancing!

DSC_0044

This is my first Hobgoblin, the one that started it all. Unfortunately, I had to do some emergency surgery to him and whilst putting him in his new habitat, I re-broke his arm. Poor guy!