Showing posts with label Halloween Decorations. Show all posts

Tuesday, October 6, 2015

A Catch-Up with the Good Witch

Hello there, sweet Witchie-Poos! I’ve been kinda in and out in the blogging world for a bit. I hope to be catching back up and getting out of the funk that I’ve been in for awhile.

I’ve been super busy with everything that life has gotten a little crazy. But now I’m here to show you a little glimpse of what I’ve been up to!

DSC_0191

We’ve been taking more drives lately since gas prices have been down. Thank goodness! I was getting a little stir crazy!

DSC_0533

DSC_0558

DSC_0018

DSC_0635

These were taken out by the lake where we live. We’ve been granted some gorgeous sunsets as of late and I haven’t been taking advantage of them.

DSC_0727

Also got to do an alternative pinup session. It was awesome!!!

DSC_0908

Yup, those are the horns I made!

DSC_0942

DSC_0100

DSC_09332

And I also got to finish and post my first bridal pinup!

DSC_0074

DSC_0113

DSC_0197

DSC_0263

And I’ve got my Halloween decorations up for the most part. I do still have a few things to do, but they’re minor. But that’s or another post Winking smile

Tuesday, October 21, 2014

DIY Halloween Tutorial: Hanging Spirits

So… I’m a Pinterest freak. Seriously… It’s an illness. I saw a picture of these things on there and with a little sleuthing I finally found the tutorial for it. Lowe and behold, it was a Martha Stewart tutorial. I was amazed. I didn’t know the Domestic Queen could come up with something so cool and amazing. So… Sit back, read this and then go make some hanging spirits.

Supplies You’ll Need

DSC_0001

You’ll need some newspaper to lay out on your work surface if you’re a messy crafter like I am lol. Sponge brushes are the best tools to work with. You can also use just a regular paintbrush to help kinda push the cheesecloth into the nooks and crannies. You’ll need some cheesecloth. You can get this at Hobby Lobby, Michaels or Walmart. Scissors are a must. You’ll need however many foam heads you want. My sister got these for me over at Sally’s for super cheap (cheaper you can get them at Hobby Lobby!) and you’ll need Alleen’s Fabric Stiffener. This works awesome and you’ll definitely use a bit of it, so get the biggest bottle you can.

DSC_0003

Step One:

Cut your cheesecloth to varying lengths. Make some long, some short.

DSC_0004

Open it up and spread it out so you don’t have to do this when you’re right in the middle of everything.

DSC_0005

Step Two:

Get ready to get messy. Pour out a good amount of the fabric stiffener on a paper plate and have your sponge brush at the ready.

DSC_0006

Step Three:

Drape your cheesecloth over the foam head. I usually start with a shorter piece of cloth at first and build up from there.

DSC_0007

Step Four:

Start glopping on your fabric stiffener. It isn’t going to look completely perfect, but it doesn’t really matter. They’re both white so it’s not really going to show. It is kinda hard to get the cheesecloth to stay in the hollows of the eye, but you just have to keep at it until it looks like you want it to.

DSC_0009

You’ll continue on with the rest of the layers of cheesecloth.

NOTE: You do NOT have to cover the entire head with the fabric stiffener. I use the seam of the foam head in the middle to judge where to start with it and then end right around the jaw line/chin.

You can put four to seven layers of cheesecloth, it is all a matter of how flowy you want it. I put four layers on each of mine and I’m pretty pleased with how it looks. But it probably could have used a couple more.

Now these things have to dry completely, and I mean completely. And it will take at least 24 hours, if not closer to 48. The more layers, the longer it will take to dry. It is some SUPER sticky stuff, so make sure wherever you put it, you don’t have to worry about it falling over or sticking to something.

DSC_0011

Step Five:

When you’re all done and everything is dry, then you’re ready to hang them! You’ll need some fishing line, a pair of scissors and eye hooks or eyelet screws.

DSC_0013

Be mean and give your foam head a headache by taking the eye hook and pushing it into the top of the head. If you’re planning on leaving this out for a few days (and I really don’t, because the fabric stiffener doesn’t react well with moisture) you might want to use a little epoxy or hot glue to make sure that the eye hook stays in there. Then string with fishing line and hang!

DSC_0018

DSC_0021

DSC_0023

Pretty darned creepy huh? I can’t wait til Halloween and I can put them all out. I think they’re really gonna creep people out. It’s gonna be fabulous. I will of course I’ll have pictures of the final setup!

Let me know if you make these awesome little ghoulies!

Monday, September 22, 2014

Tutorial Corner: Halloween Hobgoblins and their habitat

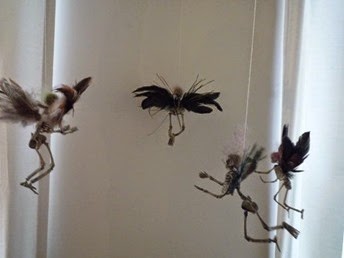
So I’ve been sharing pictures on my Facebook via Instagram of the cute little Hobgoblins I’ve been making. I got the idea from a picture on Pinterest:
764858aa1b62b6caa3b92601c1418b0e

I was like hmmm… I could do those with no problem! So here’s how I did them!

DSC_0002

You’ll need a habitat (if you want one, it’s optional! You can always hang them from the ceiling from fishing line, as it’s shown in the picture above. You’ll also need some feathers of your choice (Walmart, $2.97); Spanish Moss (Walmart, $3.49); miniature skeletons of your choice. I got mine at the Dollar Tree. They’re a part of a “Skeleton Garland” that I just cut apart from the string. You’ll also need a hot glue gun, glue sticks and scissors.

DSC_0005

Step One: Remove your skeletons from the string (if applicable).
DSC_0006

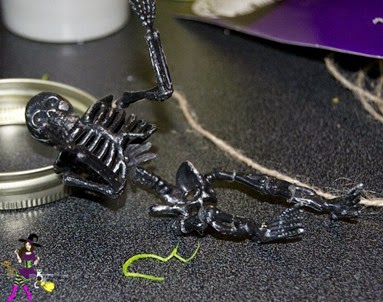
Step Two: If needed, shorten the legs. Just take a small bit of the lower leg out.

DSC_0007

While you’re at it, take the femur from the knee joint with your scissors. It’s best to do both legs at the same time, just make sure you don’t get your sides confused.

DSC_0008

With a small amount of hot glue, attach the lower leg back together.

DSC_0009

Do the same with the thigh.

DSC_0010

Then glue the leg all together. Give the knee a bit of a bend backwards to make it look like it’s floating.

DSC_0011

DSC_0012

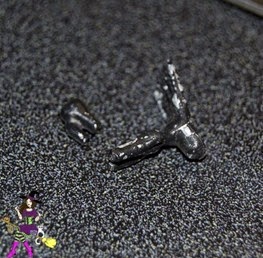
Step Three: Cut the lower arm off at the elbow. Poor Skelley.

DSC_0013

Step Four: Kind of bend your skeletons arm at the joint however you want it.

DSC_0014

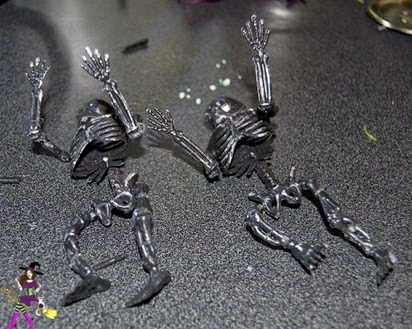
Step Five: Glue the arms to the elbows in a raised fashion so it looks like this:

DSC_0015

DSC_0016

Pose your dude like he’s drunk.

DSC_0017

And him and his buddy will eventually look like they’re doing the Thriller.

Now comes the fun part….

DSC_0019

Step Six: Taking your feathers, get your idea laid out on the table in front of you. Think about how they’ll look on the finished product, so make sure the curved feathers go in the right direction.

DSC_0020

Step Seven: Using a pretty good size dollop of hot glue (be careful not to burn your fingers!) attach the wings to the back, right between the shoulder blades on the spine.

DSC_0021

Finish both sides and then take a smaller feather to cover up the mess you made out of the spines of the feathers. Trust me, you’ll make a mess. I know I did.

DSC_0022

Repeat the steps with your other, more bashful, Hobgoblin.
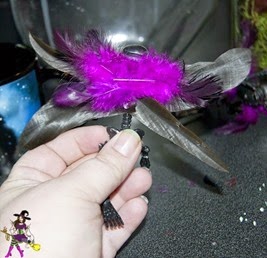
DSC_0023

And make it look like it has an awesome little purple backpack.
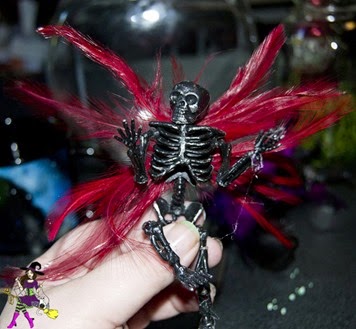
DSC_0024

Ehhhh this one doesn’t really care, as long as he’s part of the party.

DSC_0029

Step Eight: With a small amount of hot glue, affix a bit of the fishing line to your hobgoblins back.

DSC_0031

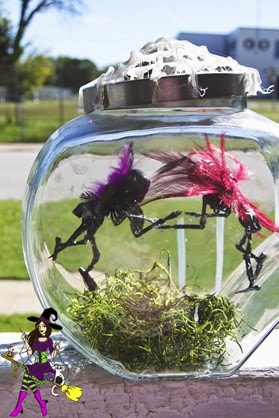
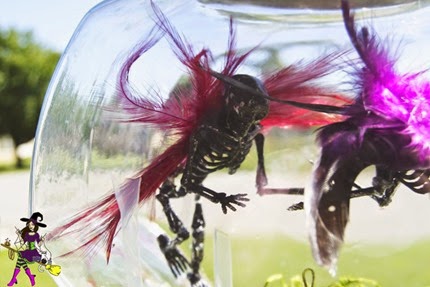
Step Nine: If you’re making a habitat, this is the time to figure out how you’re going to want to fix them in it. I was having issues trying to get them on the lid right, so I ended up using a small amount of glue on the rim of my glass canister and held the fishing line for a bit for the glue to firm.

Add some Spanish moss, some twigs and maybe some mini-tombstones if you have them and voila! You have a Hobgoblin Habitat. But! Please Note: If you plan on leaving these outside, please note that you’ll want to use high heat hot glue. If not, if they are in direct sunlight, the hot glue will weaken and your hobgoblins will fall apart. Plus, if they’re in a small container, like a jar, the glue heats up and causes condensation in the jar, so make sure to poke a few holes for heat to get out (oh and to let your Hobgoblin breathe!)
DSC_0035

DSC_0038

DSC_0039

If you would like to see a tutorial on how to do the spider web lid to this canister, let me know and I’ll do one!

DSC_0041

Awww look they’re dancing!

DSC_0044

This is my first Hobgoblin, the one that started it all. Unfortunately, I had to do some emergency surgery to him and whilst putting him in his new habitat, I re-broke his arm. Poor guy!